
Any web page can be accessed through the HubSpot Sales Chrome extension. In your Chrome browser, when this feature is enabled, a sidebar will appear on every website you visit. You can match domain names to existing company profiles or create new company records in HubSpot using the sidebar. From your prospect's website, Salesforce, or Gmail, you can enroll contacts in sequences, send emails, make calls, and view HubSpot records.
**Please note: you must be using the most up to date version of the HubSpot Sales Chrome extension to access it across the web.
Access and manage your HubSpot Chrome extension
To access the extension, click the HubSpotocket sprocket icon in the top right of the browser’s address bar. Here you can view your activity feed or configure your settings.

The HubSpot Chrome extension may need to be pinned to your toolbar if it isn't appearing in your browser's address bar.
Activity feed
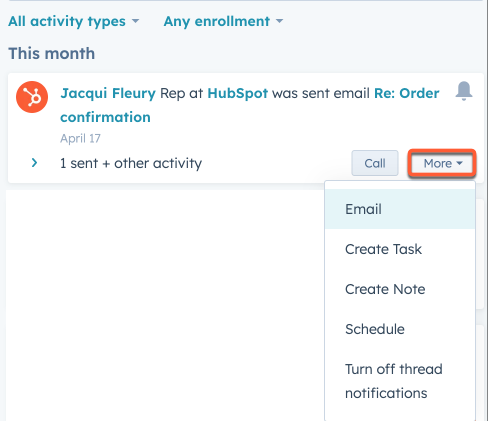
You can review your sales activity notifications on the Activity feed tab. You receive real-time notifications when a lead visits your site, opens or clicks a tracked email, views a shared document, or schedules a meeting.
Hover over the activity and click Call to follow up with a contact in HubSpot. Or, click the More dropdown menu and select from the following:
-
Email: send a sales email to the contact.
-
Create task: create a task on the contact record.
-
Create note: log a note on the contact record.
-
Schedule: schedule a meeting with the contact.
-
Turn off thread notifications: mute new notifications for a specific email threa
Settings
You can control where your extension is turned on, exclude websites, and select an account with which you wish to use it.
Extension enablement
-
The Extension Enablement section allows you to enable the extension for Gmail, Salesforce, and all other websites:
-
Gmail: the HubSpot Chrome extension is enabled by default for gmail.
-
Salesforce: to access the HubSpot Chrome extension in Salesforce:
-
Toggle the switch on.
-
In the dialog box, click Allow.
-
-
-
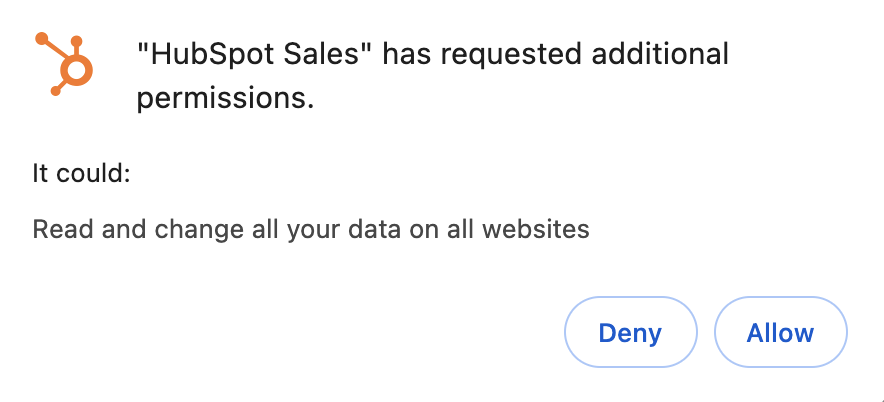
All other websites: to access the HubSpot Chrome extension across the web:
-
Toggle the switch on.
-
In the dialog box, click Allow.
-
Website exclusions
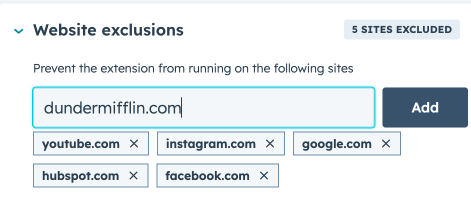
You can prevent the HubSpot Chrome extension from running on specific sites in the Website exclusions section:
-
Enter the URL of the website you want to exclude.
-
Click Add.
-
The following sites have been excluded by default: facebook.com, youtube.com, instagram.com, google.com, and hubspot.com.
-
Click the X beside the website URL and refresh the page to remove it from the exclusion list.
Enable Copilot
You can access Copilot in the HubSpot Sales Chrome Extension by enabling the Enable Copilot switch. You can request information, generate content, and perform actions. Learn more about using Copilot.

Accounts in use
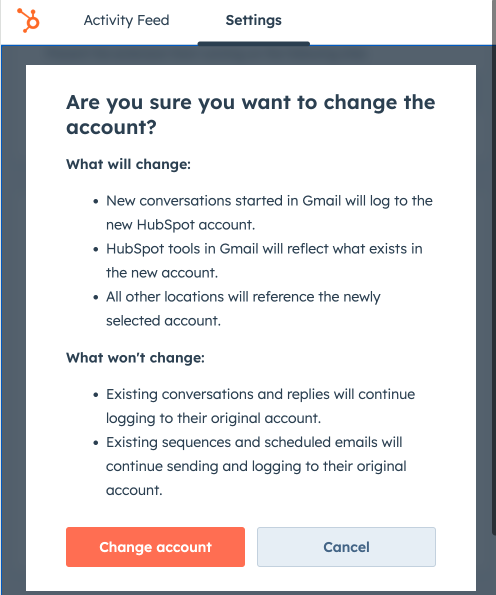
As you scroll down, you'll see the HubSpot account you're currently logged into marked as In use. To select a different HubSpot account:
-
Select an account from the dropdown menu
-
Select an account.
-
Click Change account in the dialog box.
Additional help
The Additional help section of the extension settings allows you to review HubSpot's Customer Terms of Service, uninstall the extension or submit feedback on the extension.
Use the HubSpot Sales Chrome Extension across the web
When you enable All other websites and browse a website that is not on the Website exclusion list, you'll see the HubSpot Sales sidebar toggle. Using this sidebar, you can find domain names that match existing company profiles or create new company records.
Click the HubSpot sprocket icon at the side of any website to access the HubSpot Sales Chrome extension.

Sidebar for new companies
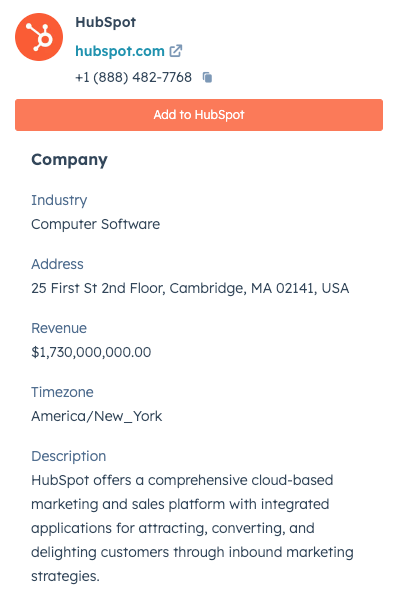
When you browse a domain for a company without a HubSpot record, you'll see the company header, domain, and phone number. By clicking Add to HubSpot, you can create a company record and add it to HubSpot. Some properties will be populated from HubSpot Insights.
Sidebar for existing companies
When browsing a domain for an existing company in HubSpot, you'll see the company name, domain, and phone number. You can interact with the record by clicking the respective icons below the primary properties. To view the record in HubSpot, click Open in CRM.

On the Company tab:
-
About this company: view the company properties that you have configured on the company record.
-
Deals: view deals associated with the company record. Create and associate new or existing deals with the company by clicking + Add.
-
Tickets: view tickets associated with the company record. To create and associate new or existing tickets to the company, click + Add.
On the Activity tab:
-
View activities associated with the company.
-
Click the > arrow to expand the section.

On the Contacts tab:
Contacts associated with the company can be viewed here. In the sidebar, you can search for contacts or click on a specific contact.
-
Click the contact record.
-
By clicking the respective icons below the primary properties, you can interact with the record.
-
To view the record in HubSpot, click Open in HubSpot.
-
On the Details tab:
-
About this contact: view the contact properties that you have configured on the contact record.
-
Deals: view deals associated with the contact record. Click + Add to create and associate new or existing deals to the contact.
-
Tickets: view tickets associated with the contact record. To create and associate new or existing tickets with a contact, click + Add.
-
-
On the Activity tab:
-
View activities associated with the contact.
-
Click the > arrow to expand the section.
-

Access Copilot from the HubSpot Sales Chrome extension
Copilot is accessible from the HubSpot Sales sidebar. HubSpot Sales Chrome extension settings must have Copilot enabled.
Click the Copilot icon at the side of any website to access Copilot through the HubSpot Sales Chrome extension.
![]()
Use the HubSpot Sales Chrome extension with records in Salesforce (Professional and Enterprise accounts only)
If you turn on the HubSpot Sales extension for Salesforce, you will be able to see the HubSpot Sales sidebar when using Salesforce. HubSpot tools, such as calling, meetings, sequence enrollments, and more, will be available directly in Salesforce and on your Salesforce contact, lead, and account records. Contact and company profiles in Salesforce will be matched with related profiles in HubSpot in this sidebar.
Please note:
- To use the HubSpot Chrome extension with Salesforce records, Salesforce users must also be a user in HubSpot and logged in to the latter system. Users will need the View records permissions in HubSpot.
- For the Chrome extension to display information on a Salesforce account or opportunity record, the account/opportunity must be syncing with a respective HubSpot company/deal, and that company/deal must have an associated, syncing contact.
In Salesforce, you can access the HubSpot Sales Chrome extension by following these steps:
-
Click the sprocket sproket icon on a Salesforce contact, lead, or account page.
-
Review the HubSpot record details in the right panel. There are also the following options available to users:
-
Add notes to the HubSpot record
-
-
Users with a paid Sales Hub or Service Hub Professional or Enterprise seat will also be able to:

Use the HubSpot Sales Chrome extension to bulk enroll contacts or leads in Salesforce
You can bulk enroll contacts or leads from Salesforce directly into a HubSpot sequence if you have a paid Sales Hub or Service Hub Professional or Enterprise seat:
-
Select the checkboxes next to the contacts or leads you want to enroll in a sequence from the Salesforce contact or lead page.
-
Click Enroll in sequence at the top left.
-
You can search for a sequence by name in the dialog box, or select a filter option from the Owner dropdown menu.
-
In the Last used at column, you will see the sequences you last sent. Click a column header to sort your sequences.
-
Select a sequence by hovering over it.
-
In the next window, customize your sequence templates and settings. Learn more about personalizing your sequence email content.
-
Your sequence should begin with the email template you specify, steps should be delayed, and times should be specified for each template.
-
Then, click Start sequence.
